Java Gnome FAQ Widgets
–Ь–∞—В–µ—А–Є–∞–ї –Є–Ј Wiki.crossplatform.ru
In this part of the Java Gnome programming tutorial, we will introduce some widgets.
Widgets are basic building blocks of a GUI application. Over the years, several widgets became a standard in all toolkits on all OS platforms. For example a button, a check box or a scroll bar. The GTK+ toolkit's philosophy is to keep the number of widgets at a minimum level. More specialized widgets are created as custom widgets.
–°–Њ–і–µ—А–ґ–∞–љ–Є–µ |
Label
The Label widget shows text.
package com.zetcode;

import org.gnome.gdk.Event;
import org.gnome.gtk.Gtk;
import org.gnome.gtk.Label;
import org.gnome.gtk.Widget;
import org.gnome.gtk.Window;
import org.gnome.gtk.WindowPosition;

/**
 * ZetCode Java Gnome tutorial
 *
 * This program uses Label widget
 * to display text.
 *
 * @author jan bodnar
 * website zetcode.com
 * last modified March 2009
 */

public class GLabel extends Window {


    public GLabel() {

        setTitle("Death song");

        initUI();

        connect(new Window.DeleteEvent() {
            public boolean onDeleteEvent(Widget source, Event event) {
                Gtk.mainQuit();
                return false;
            }
        });

        setPosition(WindowPosition.CENTER);
        showAll();
    }

    public void initUI() {

        Label lyrics = new Label("Lets sing the death song kids\n\n" +
        "We light a candle on an earth\n" +
        "We made into hell\n" +
        "And pretend that were in heaven\n" +
        "Each time we do we get\n" +
        "The blind mans ticket\n" +
        "And we know that nothings true\n" +
        "I saw priest kill a cop on the tv\n" +
        "And I know now theyre our heroes too\n\n" +

        "We sing the death song kids\n" +
        "Because weve got no future\n" +
        "And we want to be just like you\n" +
        "And we want to be just like you\n");

        add(lyrics);

        setBorderWidth(8);
    }

    public static void main(String[] args) {
        Gtk.init(args);
        new GLabel();
        Gtk.main();
    }
}
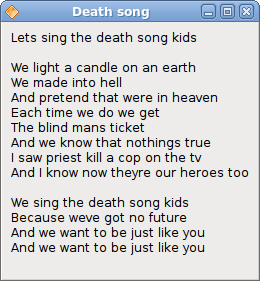
The code example shows some lyrics on the window.
 Label lyrics = new Label("Lets sing the death song kids\n\n" +
 "We light a candle on an earth\n" +
 ...
This is the text we will display in the Label widget.
setBorderWidth(8);
The Label is surrounded by some empty space.
HSeparator
HSeparator is an ornament widget, which can be used to separate items on the window.
package com.zetcode;

import org.gnome.gdk.Event;
import org.gnome.gtk.Gtk;
import org.gnome.gtk.HSeparator;
import org.gnome.gtk.Label;
import org.gnome.gtk.VBox;
import org.gnome.gtk.Widget;
import org.gnome.gtk.Window;
import org.gnome.gtk.WindowPosition;

/**
 * Java Gnome tutorial
 *
 * This program shows how to use
 * a horizontal separator.
 *
 * @author jan bodnar
 * website zetcode.com
 * last modified March 2009
 */


public class GHSeparator extends Window {

    private final int VERTICAL_SPACE = 15;
    private final int BORDER_AROUND = 25;
    private final float Y_ALIGN = 0f;
    private final float X_ALIGN = 0f;

    public GHSeparator() {

        setTitle("HSeparator");

        initUI();

        connect(new Window.DeleteEvent() {
            public boolean onDeleteEvent(Widget source, Event event) {
                Gtk.mainQuit();
                return false;
            }
        });

        setPosition(WindowPosition.CENTER);
        showAll();

    }

    public void initUI() {

        VBox vbox = new VBox(false, VERTICAL_SPACE);

        Label zinc = new Label("Zinc is a moderately reactive, blue" +
        "gray metal that tarnishes in moist air and burns in air of zinc " +
        "oxide. It reacts with acids, alkalis and other non-metals. If not" +
        "completely pure, zinc reacts with dilute acids to release hydrogen.");

        zinc.setLineWrap(true);
        zinc.setAlignment(X_ALIGN, Y_ALIGN);

        vbox.packStart(zinc);

        HSeparator hsep = new HSeparator();
        vbox.packStart(hsep);

        Label copper = new Label("Copper is an essential trace nutrient to" +
        "all high plants and animals. In animals, including humans," +
        "it is found primarily in the bloodstream, as a co-factor in various" +
        "enzymes, and in copper-based pigments. However, in sufficient" +
        "amounts, copper can be poisonous and even fatal to organisms.");

        copper.setAlignment(X_ALIGN, Y_ALIGN);
        copper.setLineWrap(true);

        vbox.packStart(copper);
        add(vbox);

        setResizable(false);
        setBorderWidth(BORDER_AROUND);
    }


    public static void main(String[] args) {
        Gtk.init(args);
        new GHSeparator();
        Gtk.main();
    }
}
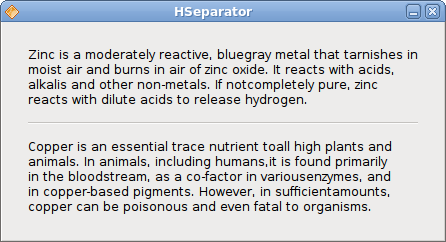
In our code example, we have descriptions of two chemical elements, which are separated by the horizontal separator.
zinc.setLineWrap(true);
This line wraps the text. This is necessary for longer texts.
zinc.setAlignment(X_ALIGN, Y_ALIGN);
This code line aligns the text to the left.
 HSeparator hsep = new HSeparator();
 vbox.packStart(hsep);
The HSeparator widget is created and placed in between the two label widgets.
CheckButton
CheckButton is a widget, that has two states. On and Off. The On state is visualised by a check mark. It is used to denote some boolean property.
 package com.zetcode;

import org.gnome.gdk.Event;
import org.gnome.gtk.CheckButton;
import org.gnome.gtk.Fixed;
import org.gnome.gtk.Gtk;
import org.gnome.gtk.ToggleButton;
import org.gnome.gtk.Widget;
import org.gnome.gtk.Window;
import org.gnome.gtk.WindowPosition;

/**
 * ZetCode Java Gnome tutorial
 *
 * This program uses a CheckButton to
 * toggle the visibility of a window title.
 *
 * @author jan bodnar
 * website zetcode.com
 * last modified March 2009
 */


public class GCheckButton extends Window implements ToggleButton.Toggled {

    CheckButton check;
    Window window;
    private String title = "Check Button";

    public GCheckButton() {

        setTitle(title);

        initUI();

        connect(new Window.DeleteEvent() {
            public boolean onDeleteEvent(Widget source, Event event) {
                Gtk.mainQuit();
                return false;
            }
        });

        setSizeRequest(250, 200);
        showAll();
    }


    public void initUI() {

        setBorderWidth(10);

        Fixed fixed = new Fixed();

        check = new CheckButton("Show title");
        check.setActive(true);
        check.connect(this);

        check.setCanFocus(false);

        fixed.put(check, 50, 50);

        add(fixed);
        setPosition(WindowPosition.CENTER);
    }

    public void onToggled(ToggleButton toggleButton) {
            if (check.getActive()) {
                setTitle(title);
            } else {
                setTitle("");
            }
    }

    public static void main(String[] args) {

        Gtk.init(args);
        new GCheckButton();
        Gtk.main();

    }
}
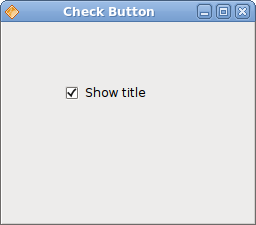
We will display a title in the titlebar of the window, depending on the state of the CheckButton.
check = new CheckButton("Show title");
CheckButton widget is created.
check.setActive(true);
The title is visible by default, so we check the check button by default.
 if (check.getActive()) {
     setTitle(title);
 } else {
     setTitle("");
 }
Depending on the state of the CheckButton, we show or hide the title of the window.
TextComboBox
TextComboBox is a widget that allows the user to choose from a list of textual options.
package com.zetcode;

import org.gnome.gdk.Event;
import org.gnome.gtk.ComboBox;
import org.gnome.gtk.Fixed;
import org.gnome.gtk.Gtk;
import org.gnome.gtk.Label;
import org.gnome.gtk.TextComboBox;
import org.gnome.gtk.Widget;
import org.gnome.gtk.Window;
import org.gnome.gtk.WindowPosition;


/**
 * ZetCode Java Gnome tutorial
 *
 * This program shows how to use
 * a TextComboBox.
 *
 * @author jan bodnar
 * website zetcode.com
 * last modified March 2009
 */

public class GTextComboBox extends Window implements ComboBox.Changed {

    TextComboBox cb;
    Label label;


    public GTextComboBox() {

        setTitle("TextComboBox");

        initUI();

        setSizeRequest(250, 200);
        setPosition(WindowPosition.CENTER);
        showAll();
    }


    public void initUI() {

        connect(new Window.DeleteEvent() {
            public boolean onDeleteEvent(Widget source, Event event) {
                Gtk.mainQuit();
                return false;
            }
        });

        Fixed fixed = new Fixed();

        label = new Label("");
        fixed.put(label, 55, 130);

        cb = new TextComboBox();

        cb.appendText("Ubuntu");
        cb.appendText("Mandriva");
        cb.appendText("Fedora");
        cb.appendText("Mint");
        cb.appendText("Debian");
        cb.appendText("Gentoo");

        cb.connect(this);

        fixed.put(cb, 50, 50);

        add(fixed);
    }

    public void onChanged(ComboBox comboBox) {
        String text = cb.getActiveText();
        label.setLabel(text);
    }

    public static void main(String[] args) {
        Gtk.init(args);
        new GTextComboBox();
        Gtk.main();
    }
}
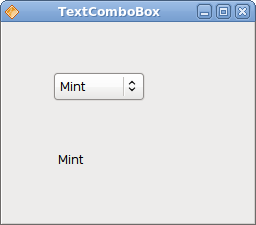
The example shows a text combo box and a label. The text combo box has a list of six options. These are the names of Linux Distros. The label widget shows the selected option from the text combo box.
cb = new TextComboBox();
The TextComboBox widget is created.
cb.appendText("Ubuntu");
The appendText() method is called to fill the text combo box.
 public void onChanged(ComboBox comboBox) {
     String text = cb.getActiveText();
     label.setLabel(text);
 }
The onChanged() method is called, when we select an option from the text combo box. We get the selected text and set it to the label widget.
Image
The next example introduces the Image widget. This widget displays pictures.
package com.zetcode;

import org.gnome.gdk.Event;
import org.gnome.gtk.Gtk;
import org.gnome.gtk.Image;
import org.gnome.gtk.Widget;
import org.gnome.gtk.Window;
import org.gnome.gtk.WindowPosition;

/**
 * ZetCode Java Gnome tutorial
 *
 * This program shows an image of a castle
 * in the window.
 *
 * @author jan bodnar
 * website zetcode.com
 * last modified March 2009
 */


public class GImage extends Window {
    public GImage() {

        setTitle("Red Rock");

        initUI();

        setPosition(WindowPosition.CENTER);
        showAll();
    }


    public void initUI() {

        connect(new Window.DeleteEvent() {
            public boolean onDeleteEvent(Widget source, Event event) {
                Gtk.mainQuit();
                return false;
            }
        });

        Image image = new Image("redrock.png");

        int width = image.getRequisition().getWidth();
        int height = image.getRequisition().getHeight();
        setSizeRequest(width, height);

        add(image);
        setBorderWidth(2);
    }

    public static void main(String[] args) {
        Gtk.init(args);
        new GImage();
        Gtk.main();
    }
}
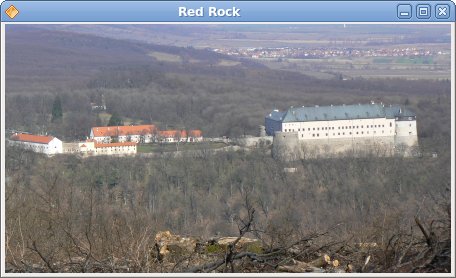
We show the Red Rock castle in the window.
Image image = new Image("redrock.png");
We create an instance of the Image widget. Notice, that we do not catch for any exceptions. The Image widget already handles them. If the Image widget cannot find the redrock.png image, it will display a missing image by default.
 Image image = new Image(castle);
 Add(image);
Image widget is created and added to the window.
In this chapter, we showed the first pack of basic widgets of the Java Gnome programming library.
Entry
The Entry is a single line text entry field. This widget is used to enter textual data.
package com.zetcode;

import org.gnome.gdk.Event;
import org.gnome.gtk.Editable;
import org.gnome.gtk.Entry;
import org.gnome.gtk.Fixed;
import org.gnome.gtk.Gtk;
import org.gnome.gtk.Label;
import org.gnome.gtk.Widget;
import org.gnome.gtk.Window;
import org.gnome.gtk.WindowPosition;

/**
 * ZetCode Java Gnome tutorial
 *
 * This program shows how to use
 * an Entry widget.
 *
 * @author jan bodnar
 * website zetcode.com
 * last modified March 2009
 */


public class GEntry extends Window {

    private Label label;
    private Entry entry;

    public GEntry() {

        setTitle("Entry");

        initUI();

        connect(new Window.DeleteEvent() {
            public boolean onDeleteEvent(Widget source, Event event) {
                Gtk.mainQuit();
                return false;
            }
        });

        setDefaultSize(250, 200);
        setPosition(WindowPosition.CENTER);
        showAll();
    }


    public void initUI() {

        label = new Label("...");

        entry = new Entry();

        entry.connect(new Entry.Changed() {
            public void onChanged(Editable editable) {
                label.setLabel(entry.getText());
            }
        });

        Fixed fix = new Fixed();
        fix.put(entry, 60, 100);
        fix.put(label, 60, 40);

        add(fix);

    }


    public static void main(String[] args) {
        Gtk.init(args);
        new GEntry();
        Gtk.main();
    }
}
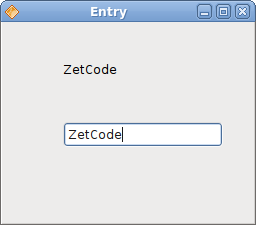
This example shows an entry widget and a label. The text that we key in the entry is displayed immediately in the label control.
entry = new Entry();
Entry widget is created.
 entry.connect(new Entry.Changed() {
   public void onChanged(Editable editable) {
       label.setLabel(entry.getText());
   }
 });
If the text in the Entry widget is changed, we call the onChanged() method. In this method, we get the text from the Entry widget and set it to the label.
Scale
The Scale is a widget, that lets the user graphically select a value by sliding a knob within a bounded interval. Our example will show a volume control.
package com.zetcode;

import java.io.FileNotFoundException;

import org.gnome.gdk.Event;
import org.gnome.gdk.Pixbuf;
import org.gnome.gtk.Fixed;
import org.gnome.gtk.Gtk;
import org.gnome.gtk.HScale;
import org.gnome.gtk.Image;
import org.gnome.gtk.Range;
import org.gnome.gtk.Widget;
import org.gnome.gtk.Window;
import org.gnome.gtk.WindowPosition;

/**
 * Java Gnome tutorial
 *
 * This program shows how to use
 * the HScale widget. It implements a
 * volume control.
 *
 * @author jan bodnar
 * website zetcode.com
 * last modified March 2009
 */

public class GHScale extends Window {

    private HScale hscale;
    private Image image;

    private Pixbuf mute;
    private Pixbuf min;
    private Pixbuf med;
    private Pixbuf max;

    public GHScale() {

        setTitle("HScale");

        initUI();

        connect(new Window.DeleteEvent() {
            public boolean onDeleteEvent(Widget source, Event event) {
                Gtk.mainQuit();
                return false;
            }
        });

        setDefaultSize(260, 120);
        setPosition(WindowPosition.CENTER);
        showAll();
    }

    public void initUI() {

        loadImages();


        hscale = new HScale(0, 99, 1);
        hscale.setSizeRequest(130, 45);
        hscale.setCanFocus(false);

        image = new Image("mute.png");

        hscale.connect(new HScale.ValueChanged() {

            public void onValueChanged(Range range) {
                int pos = (int) hscale.getValue();

                if (pos == 0) {
                    image.setImage(mute);
                } else if (pos > 0 && pos <= 30) {
                    image.setImage(min);
                } else if (pos > 30 && pos < 80) {
                    image.setImage(med);
                } else {
                    image.setImage(max);
                }
            }
        });

        Fixed fixed = new Fixed();

        fixed.put(hscale, 40, 20);
        fixed.put(image, 220, 40);

        add(fixed);
    }

    private void loadImages() {
        try {
            mute = new Pixbuf("mute.png");
            min = new Pixbuf("min.png");
            med = new Pixbuf("med.png");
            max = new Pixbuf("max.png");
        } catch (FileNotFoundException e) {
            e.printStackTrace();
        }
    }


    public static void main(String[] args) {
        Gtk.init(args);
        new GHScale();
        Gtk.main();
    }
}
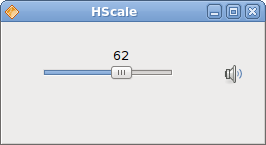
In the example above, we have HScale and Image widgets. By dragging the scale we change the image on the Image widget.
hscale = new HScale(0, 99, 1);
HScale widget is created. The parameters are lower boundary, upper boundary and step.
int pos = (int) hscale.getValue();
In the onValueChanged() method we obtain the value of the scale widget.
 if (pos == 0) {
     image.setImage(mute);
 } else if (pos > 0 && pos <= 30) {
     image.setImage(min);
 } else if (pos > 30 && pos < 80) {
     image.setImage(med);
 } else {
     image.setImage(max);
 }
Depending on the obtained value, we change the picture in the image widget.
ToggleButton
ToggleButton is a button that has two states. Pressed and not pressed. You toggle between these two states by clicking on it. There are situations where this functionality fits well.
package com.zetcode;

import org.gnome.gdk.Color;
import org.gnome.gdk.Event;
import org.gnome.gtk.DrawingArea;
import org.gnome.gtk.Fixed;
import org.gnome.gtk.Gtk;
import org.gnome.gtk.StateType;
import org.gnome.gtk.ToggleButton;
import org.gnome.gtk.Widget;
import org.gnome.gtk.Window;
import org.gnome.gtk.WindowPosition;

/**
 * ZetCode Java Gnome tutorial
 *
 * This program demonstrates the ToggleButton
 * widget. Three toggle buttons control the
 * color of a drawing area.
 *
 * @author jan bodnar
 * website zetcode.com
 * last modified March 2009
 */

public class GToggleButton extends Window
             implements ToggleButton.Toggled {

    private ToggleButton tb1;
    private ToggleButton tb2;
    private ToggleButton tb3;

    private DrawingArea darea;
    private Color color;

    public GToggleButton() {

        setTitle("ToggleButton");

        initUI();

        setPosition(WindowPosition.CENTER);

        setSizeRequest(350, 220);
        showAll();
    }


    public void initUI() {

        color = new Color(0, 0, 0);

        connect(new Window.DeleteEvent() {
            public boolean onDeleteEvent(Widget source, Event event) {
                Gtk.mainQuit();
                return false;
            }
        });

        Fixed fixed = new Fixed();

        tb1 = new ToggleButton("Red");
        tb1.setSizeRequest(80, 35);
        tb1.connect(this);

        tb2 = new ToggleButton("Green");
        tb2.setSizeRequest(80, 35);
        tb2.connect(this);

        tb3 = new ToggleButton("Blue");
        tb3.setSizeRequest(80, 35);
        tb3.connect(this);

        darea = new DrawingArea();
        darea.modifyBackground(StateType.NORMAL, Color.BLACK);
        darea.setSizeRequest(150, 150);

        fixed.put(tb1, 20, 20);
        fixed.put(tb2, 20, 65);
        fixed.put(tb3, 20, 110);

        fixed.put(darea, 150, 20);

        add(fixed);
    }


    public void onToggled(ToggleButton toggleButton) {

        int red = color.getRed();
        int green = color.getGreen();
        int blue = color.getBlue();

        if ("Red".equals(toggleButton.getLabel())) {
            if (toggleButton.getActive()) {
                red = 65535;
            } else {
                red = 0;
            }
        }

        if ("Green".equals(toggleButton.getLabel())) {
            if (toggleButton.getActive()) {
                green = 65535;
            } else {
                green = 0;
            }
        }

        if ("Blue".equals(toggleButton.getLabel())) {
            if (toggleButton.getActive()) {
                blue = 65535;
            } else {
                blue = 0;
            }
        }

        color = new Color(red, green, blue);
        darea.modifyBackground(StateType.NORMAL, color);
    }

    public static void main(String[] args) {

        Gtk.init(args);
        new GToggleButton();
        Gtk.main();
    }
}
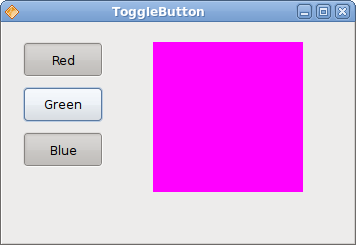
In our example, we show three toggle buttons and a DrawingArea. We set the background color of the area to black. The togglebuttons will toggle the red, green and blue parts of the color value. The background color will depend on which togglebuttons we have pressed.
color = new Color(0, 0, 0);
This is the color value that is going to be updated with the toggle buttons.
 tb1 = new ToggleButton("Red");
 tb1.setSizeRequest(80, 35);
 tb1.connect(this);
The ToggleButton widget is created. We set it's size to 80x35 pixels. It is connected to the onToggled() method.
 darea = new DrawingArea();
 darea.modifyBackground(StateType.NORMAL, Color.BLACK);
 darea.setSizeRequest(150, 150);
The DrawingArea widget is the widget, that displays the color, mixed by the toggle buttons. At start, it shows black color.
 if ("Red".equals(toggleButton.getLabel())) {
     if (toggleButton.getActive()) {
         red = 65535;
     } else {
         red = 0;
     }
 }
We update the red part of the color based on the state of the red toggle button.
 color = new Color(red, green, blue);
 darea.modifyBackground(StateType.NORMAL, color);
The color value is updated and set to the DrawingArea widget.
Calendar
Our final widget is the Calendar widget. It is used to work with dates.
package com.zetcode;

import org.gnome.gdk.Event;
import org.gnome.gtk.Calendar;
import org.gnome.gtk.Gtk;
import org.gnome.gtk.Label;
import org.gnome.gtk.VBox;
import org.gnome.gtk.Widget;
import org.gnome.gtk.Window;
import org.gnome.gtk.WindowPosition;

/**
 * ZetCode Java Gnome tutorial
 *
 * This program demonstrates the Calendar
 * widget. We show a selected date in a
 * label widget.
 *
 * @author jan bodnar
 * website zetcode.com
 * last modified March 2009
 */

public class GCalendar extends Window {

    private Calendar calendar;
    private Label label;

    public GCalendar() {

        setTitle("Calendar");

        initUI();

        connect(new Window.DeleteEvent() {
            public boolean onDeleteEvent(Widget source, Event event) {
                Gtk.mainQuit();
                return false;
            }
        });

        setDefaultSize(260, 120);
        setPosition(WindowPosition.CENTER);
        showAll();
    }

    private void initUI() {

        VBox vbox = new VBox(false, 1);

        calendar = new Calendar();
        label = new Label(getDate());

        calendar.connect(new Calendar.DaySelected() {

            public void onDaySelected(Calendar calendar) {
                label.setLabel(getDate());
            }
        });

        vbox.add(calendar);

        label.setSizeRequest(-1, 50);
        vbox.add(label);

        add(vbox);
    }


    private String getDate() {
        int year = calendar.getDateYear();
        int month = calendar.getDateMonth();
        int day = calendar.getDateDay();
        String dateLabel = month + "/" + day + "/" + year;

        return dateLabel;
    }


    public static void main(String[] args) {
        Gtk.init(args);
        new GCalendar();
        Gtk.main();
    }
}
We have the Label. The selected day from the calendar is shown in the label.
calendar = new Calendar();
Calendar widget is created.
 public void onDaySelected(Calendar calendar) {
     label.setLabel(getDate());
 };
In the onDaySelected() method we update the label to the currently selected date.
In this chapter, we finished talking about widgets in Java Gnome.
