Qt:–Ф–Њ–Ї—Г–Љ–µ–љ—В–∞—Ж–Є—П 4.3.2/designer-editing-mode
–Ь–∞—В–µ—А–Є–∞–ї –Є–Ј Wiki.crossplatform.ru
| –Т–љ–Є–Љ–∞–љ–Є–µ: –Р–Ї—В—Г–∞–ї—М–љ–∞—П –≤–µ—А—Б–Є—П –њ–µ—А–µ–≤–Њ–і–∞ –і–Њ–Ї—Г–Љ–µ–љ—В–∞—Ж–Є–Є –љ–∞—Е–Њ–і–Є—В—Б—П –Ј–і–µ—Б—М |
__NOTOC__
|
–У–ї–∞–≤–љ–∞—П ¬Ј –Т—Б–µ –Ї–ї–∞—Б—Б—Л ¬Ј –Ю—Б–љ–Њ–≤–љ—Л–µ –Ї–ї–∞—Б—Б—Л ¬Ј –Ъ–ї–∞—Б—Б—Л –њ–Њ –≥—А—Г–њ–њ–∞–Љ ¬Ј –Ь–Њ–і—Г–ї–Є ¬Ј –§—Г–љ–Ї—Ж–Є–Є |
[Previous: Designing a Component with Qt Designer ] [ Contents ] [Next: Using Containers in Qt Designer ]
Qt Designer's Widget Editing Mode
In Qt Designer's Widget Editing Mode, objects can be dragged from the main window's widget box to a form, edited, resized, dragged around on the form, and even dragged between forms. Their properties can be modified interactively, so that changes can be seen immediately. The editing interface is intuitive for simple operations, yet it still supports Qt's powerful layout facilities.
–°–Њ–і–µ—А–ґ–∞–љ–Є–µ |
Managing Forms
Qt Designer allows you to create and edit new forms (open the File menu and select New Form... or press Ctrl N). Existing forms can also be edited (open the File menu and select Open Form... or press Ctrl O).
At any point, it is possible to save a form by selecting the Save Form As... option from the File menu. The .ui files saved by Qt Designer contain information about the objects used, and record the details of any signal and slot connections between them.
Editing a Form
By default, new forms are opened in widget editing mode. If Qt Designer is in another mode, you can enter widget editing mode by opening the Edit menu and selecting Edit Widgets, or by pressing the F3 key.
Objects are added to the form by dragging them from the main widget box and dropping them in the desired location on the form. Once there, they can be moved around simply by dragging them, or by using the cursor keys. Pressing the Ctrl key at the same time moves the selected widget pixel by pixel, while using the cursor keys alone make the selected widget snap to the grid when it is moved. Objects can be selected by clicking on them using the left mouse button. You can also use the Tab key to change the selection.
The widget box contains objects in a number of different categories, all of which can be simply placed on the form as required. The only objects that require a little more preparation are the Container widgets. These are described in more detail in the Using Containers in Qt Designer chapter.

| Selecting Objects
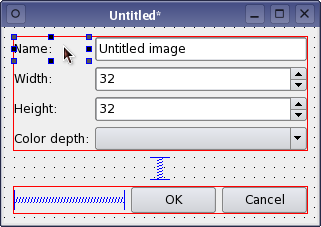
Objects on the form are selected by clicking on them with the left mouse button. When an object is selected, resize handles are shown at each corner and at the midpoint of each side, indicating that it can be resized. To select additional objects, hold down the Shift key and click on them. If more than one object is selected, the current object will be displayed with resize handles that are colored differently to the others. Alternatively, objects can be selected in the Object Inspector. |
When selected, the normal clipboard operations can be performed on a widget to cut, copy, and paste it. All of these operations are recorded in an undo buffer to enable changes to be undone and redone as necessary. The shortcuts used to perform all of these actions are described in the table below.
| Action | Shortcut | Description |
|---|---|---|
| Cut | Ctrl+X | Cuts the selected objects to the clipboard. |
| Copy | Ctrl+C | Copies the selected objects to the clipboard. |
| Paste | Ctrl+V | Pastes the objects in the clipboard onto the form. |
| Delete | Delete | Deletes the selected objects. |
| Clone object | Ctrl+drag (leftmouse button) | Makes a copy of the selected object or group of objects. |
| Preview | Ctrl+R | Shows a preview of the form. |
All the above actions (apart from cloning) can be accessed via both the Edit menu and the form's context menu. These menus also provide a Select All function to select all the objects on the form. They also provide functions for laying out objects.
Widgets are not unique objects; you can make as many copies of them as you need. To quickly duplicate a widget, you can clone it by holding down the Ctrl key and dragging it. This allows widgets to be copied and placed on the form much more quickly than with clipboard operations.
| Drag and Drop
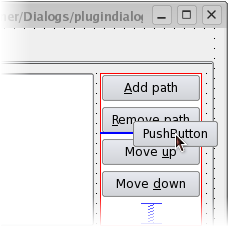
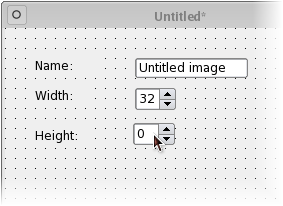
Qt Designer makes extensive use of the drag and drop facilities provided by Qt. Widgets can be dragged from the widget box and dropped onto the form. Widgets can also be "cloned" on the form: Holding down Ctrl and dragging the widget creates a copy of the widget that can be dragged to a new position. It is also possible to drop Widgets onto the Object Inspector to ease handling of nested layouts. |
Qt Designer allows selections of objects to be copied, pasted, and dragged between forms. You can use this feature to create more than one copy of the same form, and experiment with different layouts in each of them.
The Property Editor
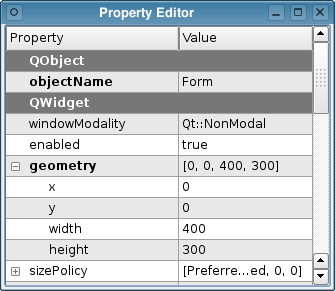
The Property Editor always displays the properties of the currently selected object on the form. The properties available depend on the object being edited, but all of the widgets provided have common properties such as objectName (the object's internal name) and enabled (whether it can be interacted with).
Certain properties are treated specially by the property editor:
- Compound properties - properties that are made up of more than one value - are represented as nodes that can be expanded, enabling their values to be edited.
- –°–≤–Њ–є—Б—В–≤–∞ that contain a choice or selection of flags are edited via combo boxes whose items can be checked.
- –°–≤–Њ–є—Б—В–≤–∞ that allow access to rich data types, such as QPalette, are modified using dialogs that open when the properties are edited. QLabel and the widgets in the Buttons section of the widget box have a text property that can also be edited by double clicking on the widget or by pressing F2. Qt Designer interprets the backslash (\) character specially, enabling newline (\n) characters to be inserted into the text; the \\ character sequence is used to insert a single backslash into the text. A context menu can also be opened while editing, providing another way to insert special characters and newlines into the text.
Dynamic –°–≤–Њ–є—Б—В–≤–∞
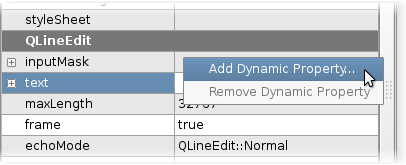
The property editor can also be used to add new dynamic properties to both standard Qt widgets and to forms themselves. Dynamic properties are added and removed via the property editor's context menu - click the right mouse button to open this.
The Object Inspector
The Object Inspector shows an up-to-date hierarchical list of the objects (widgets, layouts, spacers, and other objects) on the form that is currently being edited.
Layouts
Before the form can be used the objects on the form need to be placed into layouts. This ensures that they will be displayed properly when the form is previewed or deployed in an application. Placing objects in a layout also ensures that they will be resized correctly when the form is resized.
Applying and Breaking Layouts
The simplest way to manage objects is to apply a layout to a group of existing objects. This is achieved by selecting the objects that you need to manage and applying one of the standard layouts using the main toolbar, the Form menu, or the form's context menu.
Once widgets have been inserted into a layout, it is not possible to move and resize them individually because the layout itself controls the geometry of each widget within it, taking account of the hints provided by spacers. Instead, you must either break the layout and adjust each object's geometry manually, or you can influence the widget's geometry by resizing the layout. To break the layout you can press Ctrl+B or choose Break Layout from the form's context menu, the Form menu or the main toolbar. You can also add and remove spacers from the layout to influence the geometries of the widgets.
The form's top level layout can be set by clearing the selection (click the left mouse button on the form itself) and applying a layout.
Horizontal and Vertical Layouts
The simplest way to arrange objects on a form is to place them in a horizontal or vertical layout. For example, the dialog shown at the beginning of this chapter contains two push buttons and a spacer that are placed in a horizontal layout; this makes sure that the buttons remain next to each other when more layouts are added to the dialog. In the same way, vertical layouts ensure that each of the widgets within are aligned horizontally.
Horizontal and vertical layouts can be combined, and nested to any depth. However, if you need more control over the placement of objects, you should consider using the grid layout.
The Grid Layout
Complex form layouts can be created by placed objects in a grid layout. This kind of layout gives the form designer much more freedom to arrange widgets on the form, but can result in a much less flexible layout. However, for some kinds of form layout, a grid arrangement is much more suitable than a nested arrangement of horizontal and vertical layouts.
Splitter Layouts
Another common way to manage the layout of objects on a form is to place them in a splitter. These arrange the objects horizontally or vertically in the same way as normal layouts, but also allow the user to adjust the amount of space allocated to each object.
Although QSplitter is a container widget, Qt Designer treats them as layouts that are applied to existing widgets. To place a group of widgets into a splitter, select them as described above then apply the splitter layout by using the appropriate toolbar button, keyboard shortcut, or Lay out context menu entry.
Shortcut Keys
In addition to the standard toolbar and context menu entries, Qt Designer defines a set of keyboard shortcuts for applying layouts to widgets.
| Layout | Shortcut | Description |
|---|---|---|
| Horizontal | Ctrl+1 | Places the selected objects in a horizontal layout. |
| Vertical | Ctrl+2 | Places the selected objects in a vertical layout. |
| Grid | Ctrl+5 | Places the selected objects in a grid layout. |
| Horizontal splitter | Ctrl+3 | Creates a horizontal splitter and places the selected objects inside it. |
| Vertical splitter | Ctrl+4 | Creates a vertical splitter and places the selected objects inside it. |
| Adjust size | Ctrl+J | Adjusts the size of the layout to ensure that each child object has sufficient space to display its contents. See QWidget::adjustSize() for more information. |
Previewing Forms
Although Qt Designer's forms are accurate representations of the components being edited, it is useful to preview the final appearance while editing. This feature can be activated by opening the Form menu and selecting Preview, or by pressing Ctrl+R when in the form.
The preview shows exactly what the final component will look like when used in an application.
[Previous: Designing a Component with Qt Designer ] [ Contents ] [Next: Using Containers in Qt Designer ]
| Copyright © 2007 Trolltech | Trademarks | Qt 4.3.2
|
